Proxmox Valid SSL With Let's Encrypt and Cloudflare DNS
This is a guide to how to setup a valid SSL certificate with Let's Encrypt and Cloudflare DNS for Proxmox VE. Let's Encrypt will allow you to obtain a valid SSL certificate for your Proxmox VE Server for free for 90 days. In the following steps, we will setup a valid SSL certificate for your Proxmox VE Server using Let's Encrypt and Cloudflare DNS Challenge. The process of renewing the certificate is done automatically by Proxmox VE Server and you do not need to do anything manually to renew the certificate.
Prerequarements
- Exisiting DNS record for the domain name you want to use for Proxmox VE.
- Cloudflare DNS Zone API Access Token.
- Cloudflare DNS Zone ID.
I won't be covcovering the process of creating the Zone API Tokens at this guide. You can find more information about this process here.
Instalaion and Configuration
The process will be done fully in Proxmox web interface.
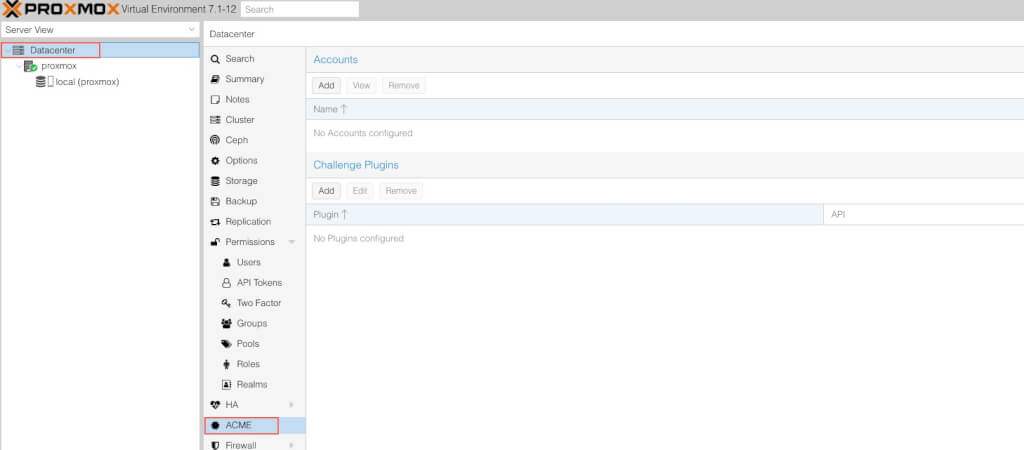
Login to the Proxmox web interface select Datacenter, find ACME and click on it.
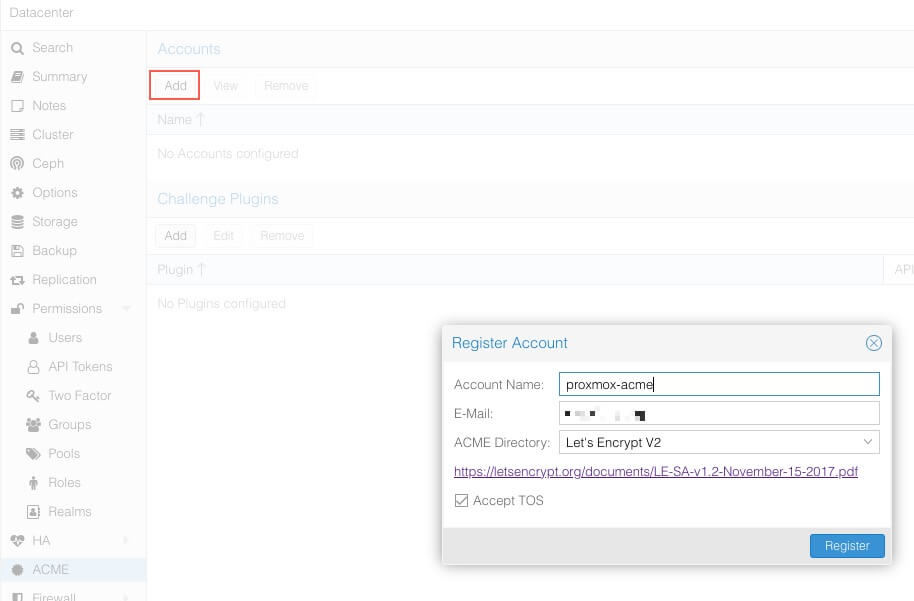
At Account section, click Add. Fill the Account Name and E-Mail. Accept the Terms and Conditions (TOC). Click Register.
This will register an account for Let's Encrypt service in order to obtain a certificate.
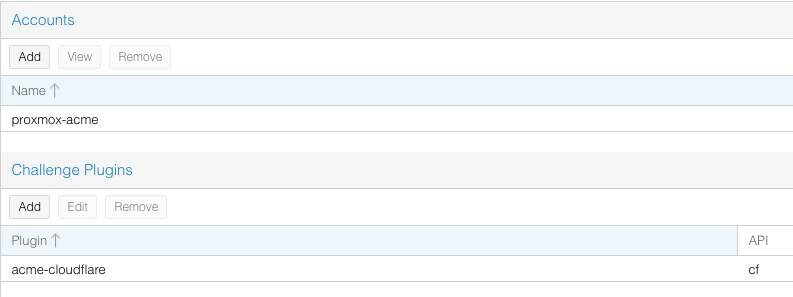
The output should be something like this:

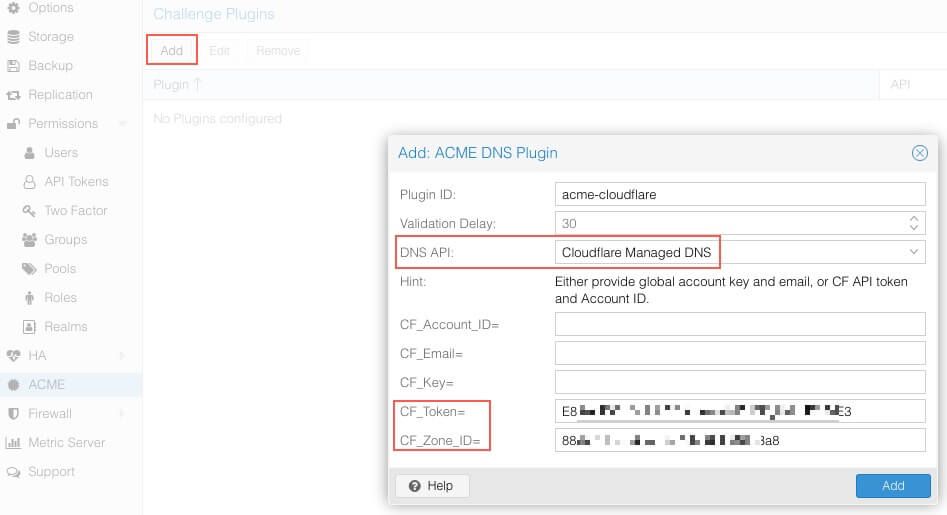
At Challenge Plugin ection, click Add. Fill the Plugin ID (name), at DNS API choose Cloudflare Managed DNS.
CF_Token= and CF_Zone_ID= are the API Tokens and Zone ID for Cloudflare DNS - leave the rest empty.
The final screen should look like this:
Select the Pve Server in my case its name proxmox, under System select Certificates.
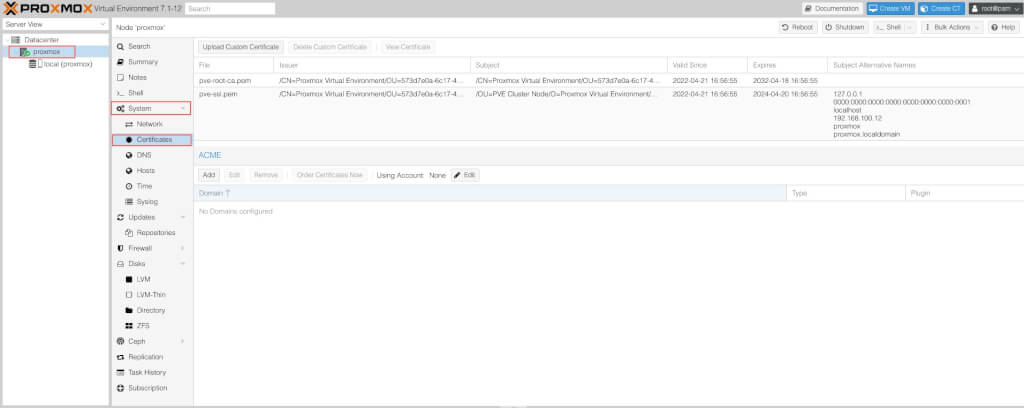
At ACME section, click Edit and select the Account we created earlier.

Click Add, select Challenge Type DNS and Challenge Plugin the plugin we created earlier. Domain is the domain name we want to use for the certificate. Click Create.
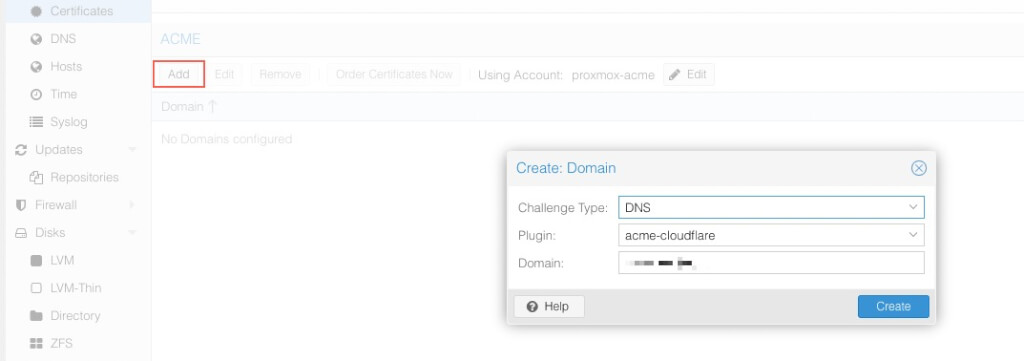
Now its time to issue the certificate. Click Order Certificate Now.

At this point Proxmox will try to issue the certificate from Let's Encrypt and validate it with Cloudflare DNS Challenge.
If all goes well, you will see the following:
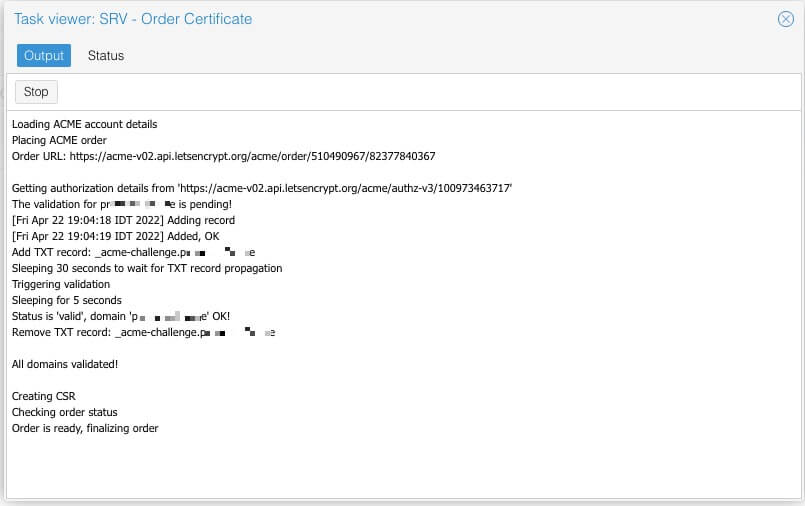
Now the certificate is installed and ready to use. The renewal process is done automatically by Proxmox VE Server.