Proxmox Windows Virtual Machine Configuration
This guide will walk you through configuring Windows 10 or Windows 11 Virtual Machines with VirtIO Disks and Networking using Proxmox. This configuration was tested to work with the GPU passthroughs feature from one of the following guides:
- GPU Passthrough to VM - Full GPU passthrough to VM guide
- iGPU Passthrough to VM - Cpu's GPU passthrough to VM guide (Intel)
- iGPU Split Passthrough - Splitting (CPU's GPU) to Multiple GPUs passthrough to VM guide
Prerequirements
Before we begin, we need to download the VirtIO Drivers for Windows iso. Upload it via the GUI as any other ISO file.
You can allso use ssh and download it directly from the Proxmox server.
wget -P /var/lib/vz/template/iso https://fedorapeople.org/groups/virt/virtio-win/direct-downloads/stable-virtio/virtio-win.iso
Create a VM in Proxmox
Create a Virutal Machine in Proxmox as usual.
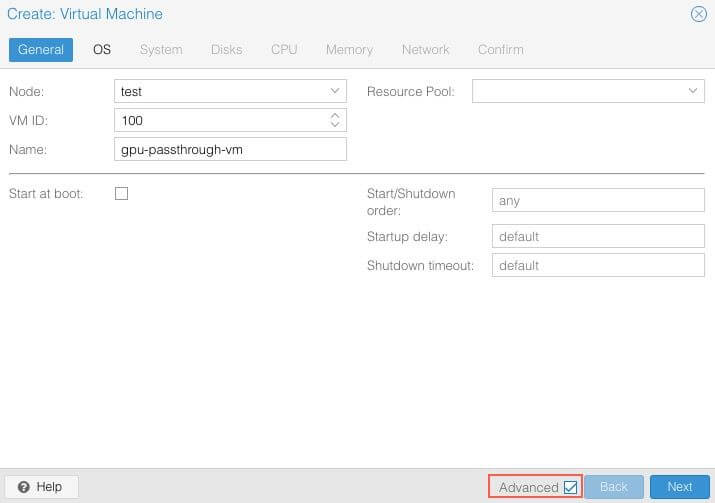
General
Select Advanced options.
OS
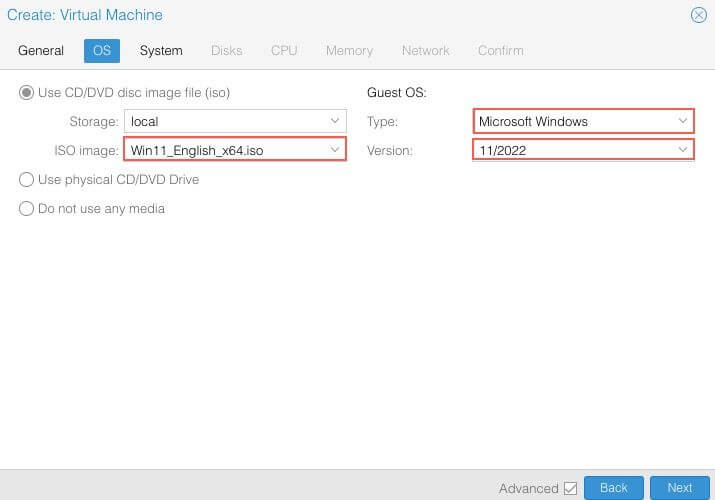
Choose the iso file image for Windows 10 or 11. Change Type to Microsoft Windows and Version to your's windows version.
System
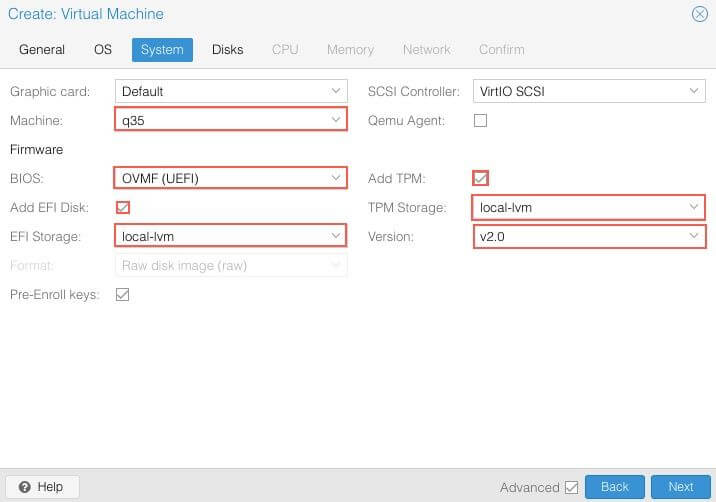
Change the Machine type to q35, BIOS to UEFI. Add TPM for Windows 11. Alocate Storage for UEFI BIOS and TPM.
Disks
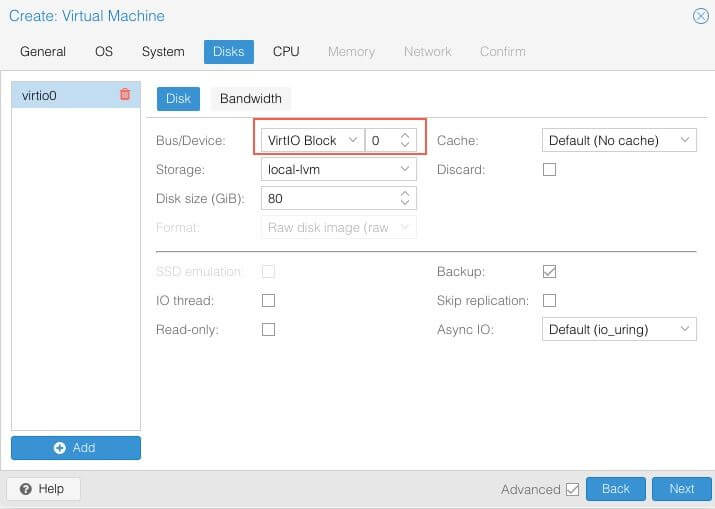
Set Bus/Device to VirtIO Block and Cache to Write Through. Select the storage disk and the VM's disk size.
CPU
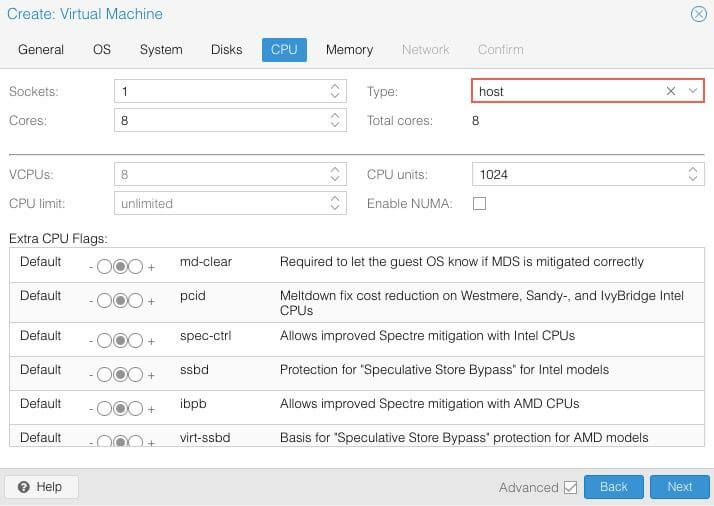
Choose how many cores you want to use. Set The cpu Type to Host
Memory
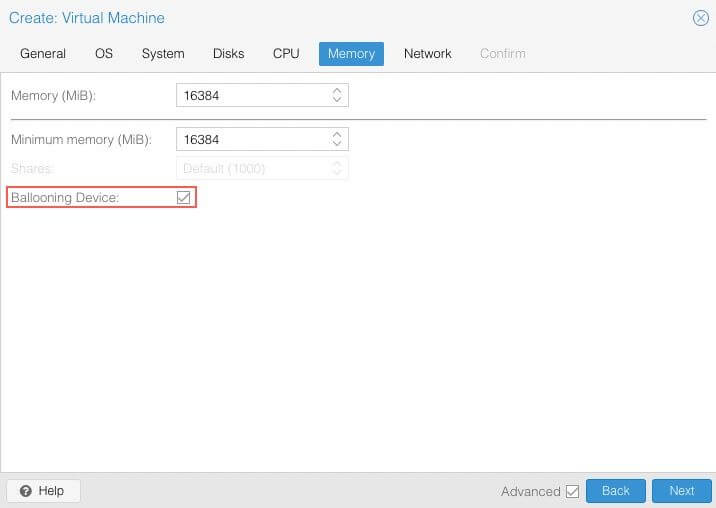
Alocate the memory for the VM. Make sure the Ballooning Device is enabled.
Network
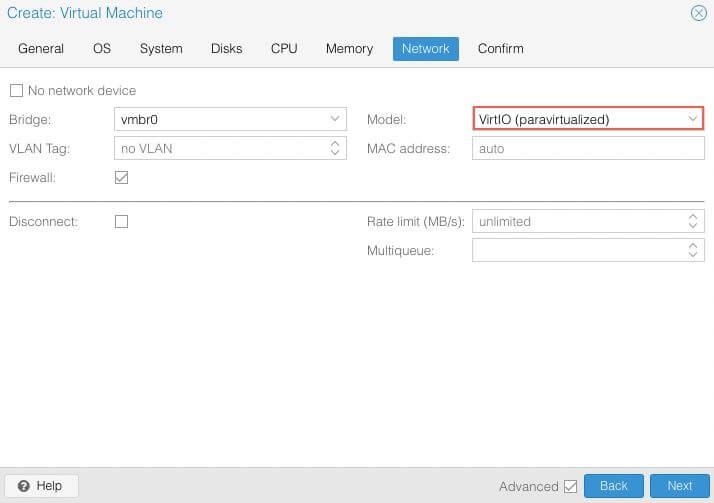
Select your preferred network interface. Set the Model to VirtIO (paravirtualized).
Confirm
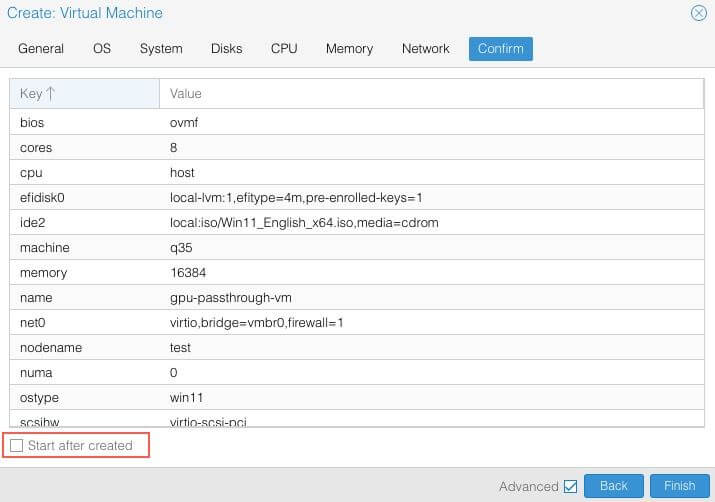
Don't Start the VM after creating it.
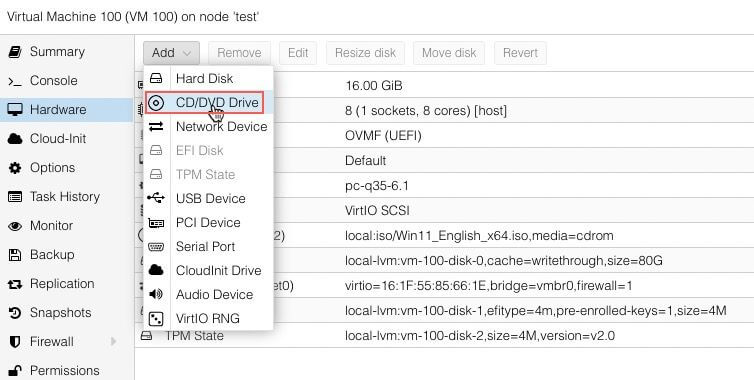
Add CD/DVD to VM
We will need to use the VirtIO Drivers for Windows iso file to install the drivers while installing the Windows VM.
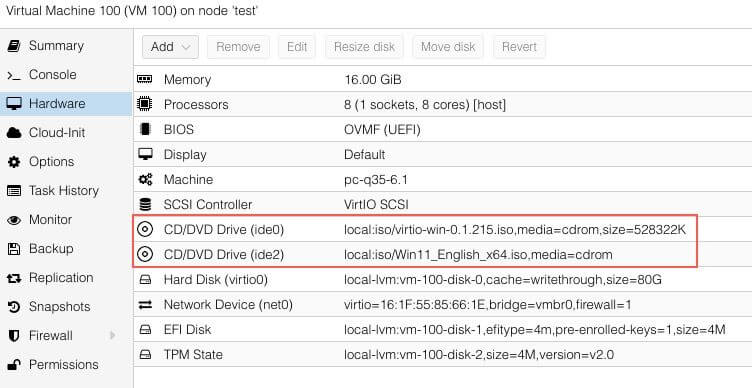
Hardware Before Installation
This how the hardware of the VM should look like befor starting the Windows installation.
Windows Installation
The Windows installation process is the same as any other Windows OS installation. The only caveat is that you need to install the drivers for the Storage devices and Network devices.
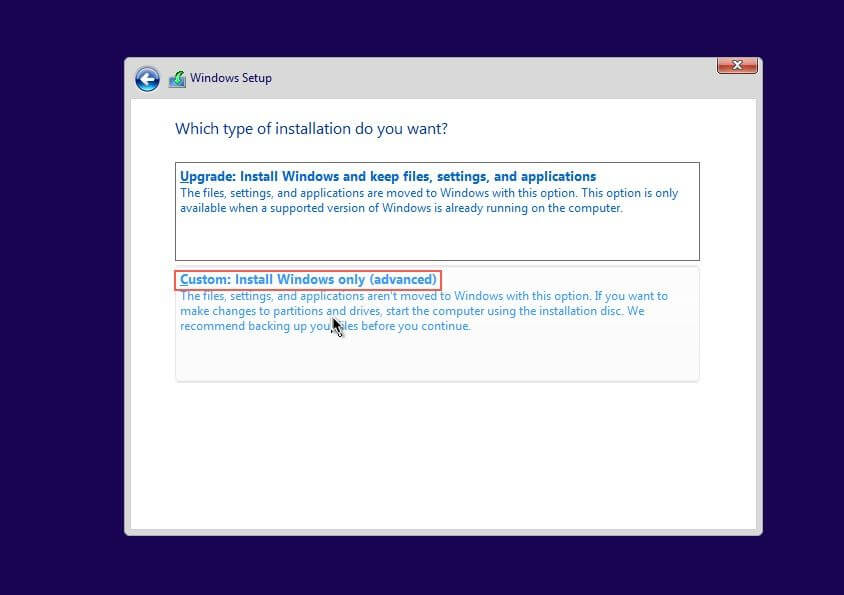
Choose Custom: Install Windows only (advanced)
Missing Storage Devices
When prompted to select the storage device to install windows the device won't show since we are using the VirtIO storage. Select Load Driver. 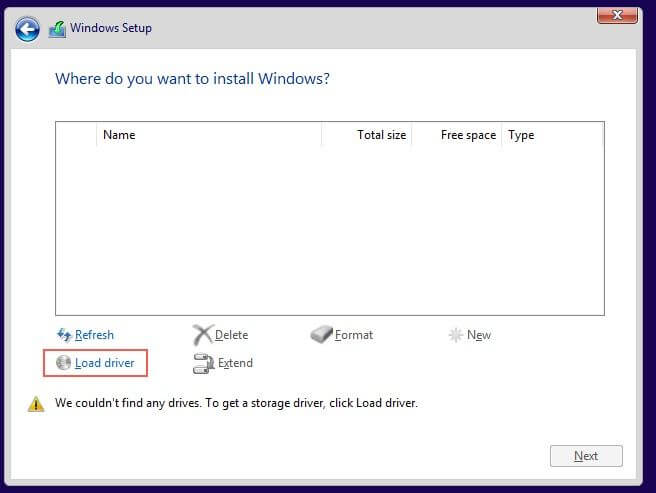
Load the VirtIO Drivers
Browse to the VirtIO Disk find a folder called viostor and select the appropriate windows driver.
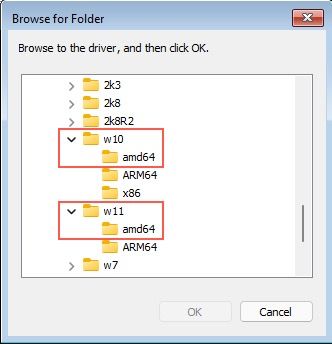
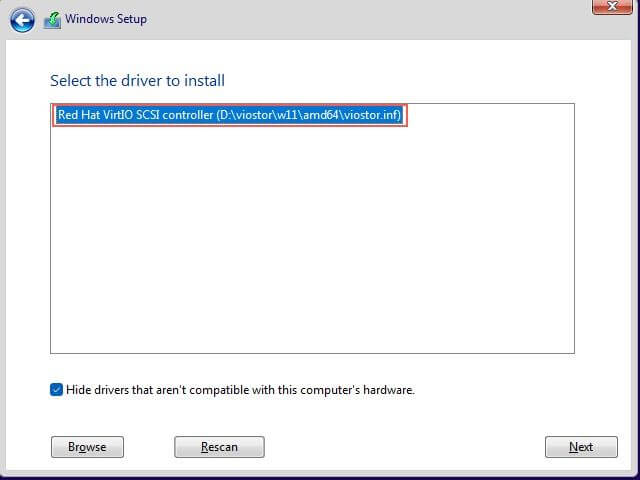
You should see the a Red Hat VirtIO driver selected. Click Next and install the driver.
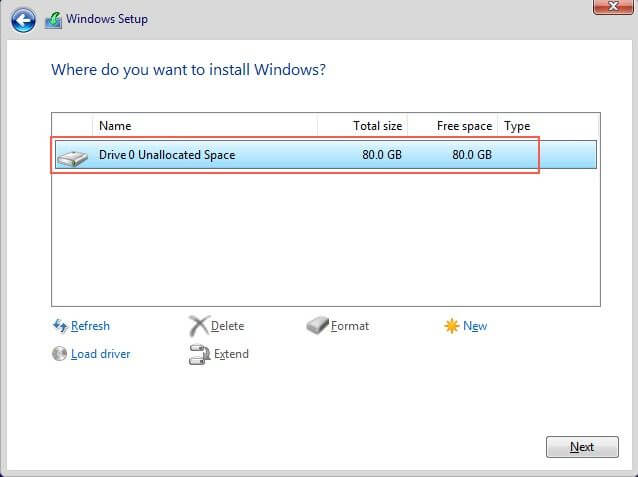
Continue with the installation as usual
Missing Network Driver
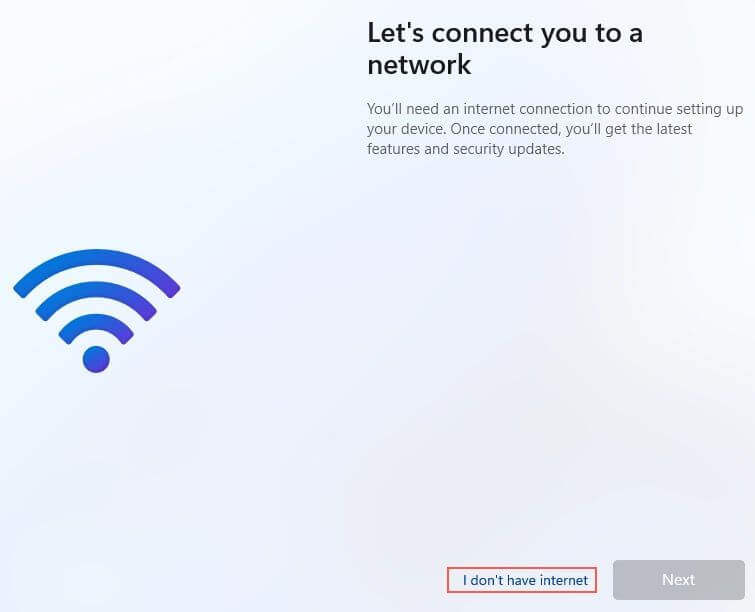
Windows won't be able to load network drivers while installing. When prompted with something for connecting to the Internet, select I Don't have internet and skip it. We will deal with the network drivers at post installation.
Post Installation
Install all the VirtIO Drivers for Windows
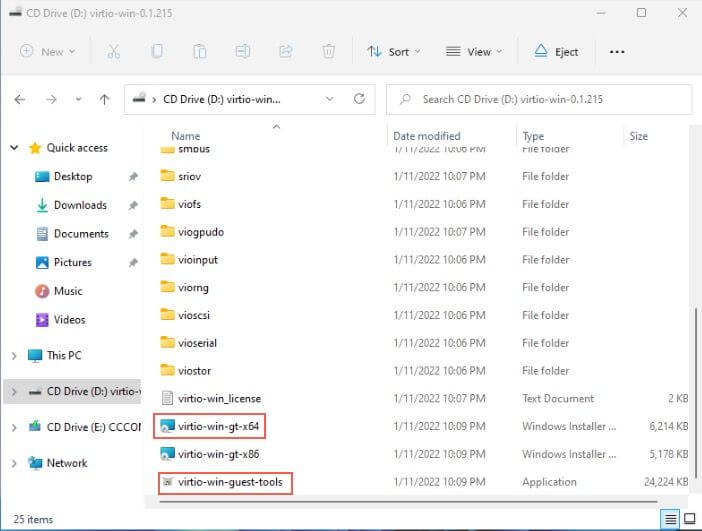
Open the VirtIO CD and run the virtio-win-gt-x64.exe, virtio-win-guest-tools installer. This will install all the missing virtio drivers for the VM and guest OS tools.
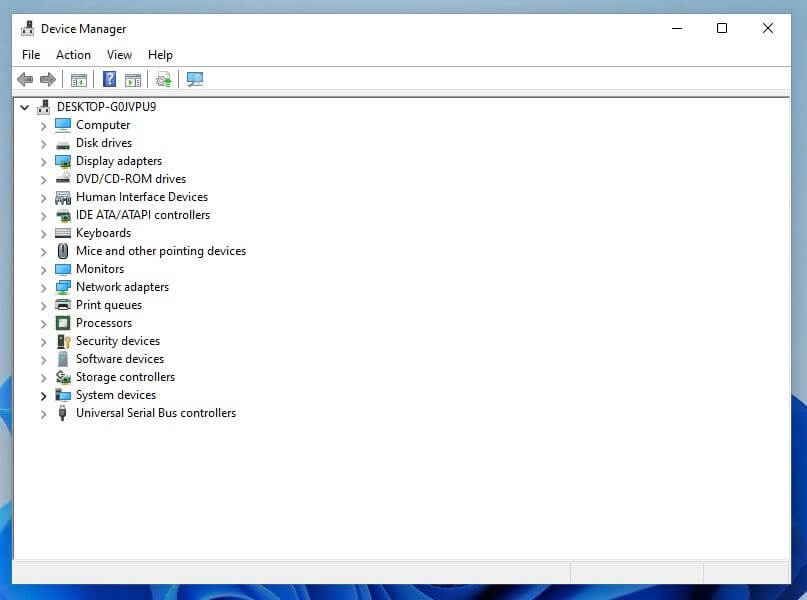
After the installtion your Device Manager should look like this without any errors.
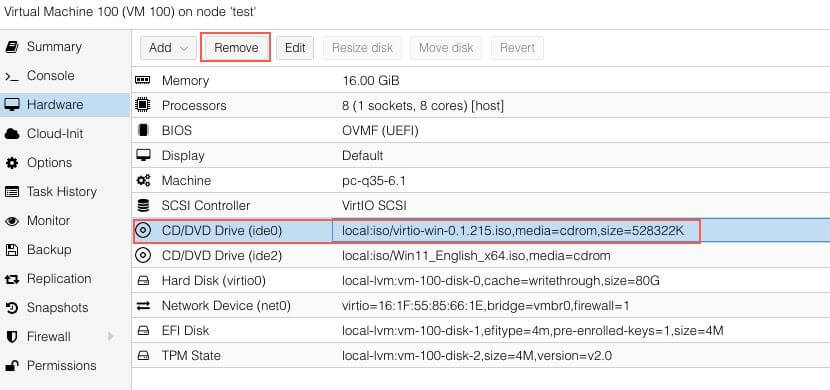
Remove the VirtIO CD/DVD and Windows iso
Power off the VM.
Remove the added CD/DVD for VirtIO iso.
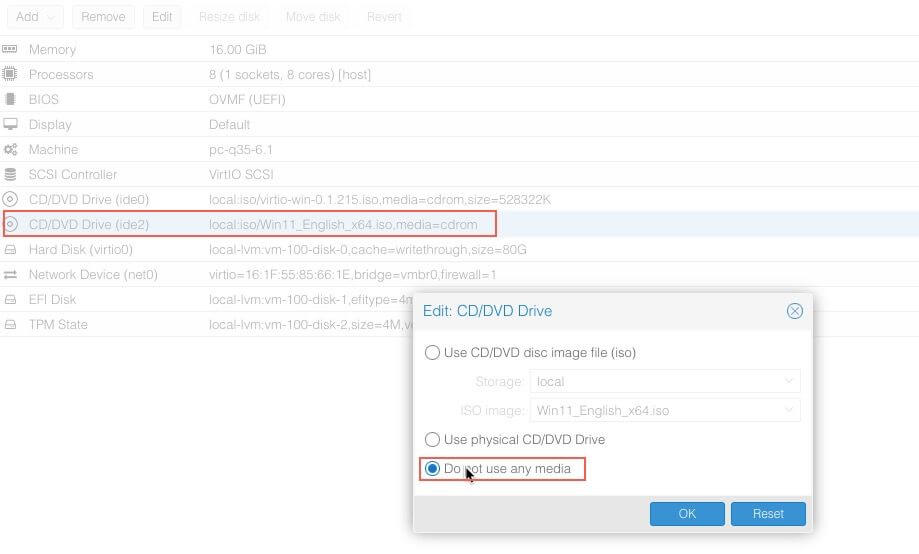
Select Do nor use any media on the CD/DVD with the Windows iso.
At this point we are done with the installation of the Windows VM.
Follow those guides for utilizing a GPU passthrough to VM:
- GPU Passthrough to VM - Full GPU passthrough to VM guide
- iGPU Passthrough to VM - Cpu's GPU passthrough to VM guide (Intel)
- [GPU Split Passthrough][gpu-split-passthrough] - Splitting (Nvidia) to Multiple GPUs passthrough to VM guide